
How To Declutter Your Home
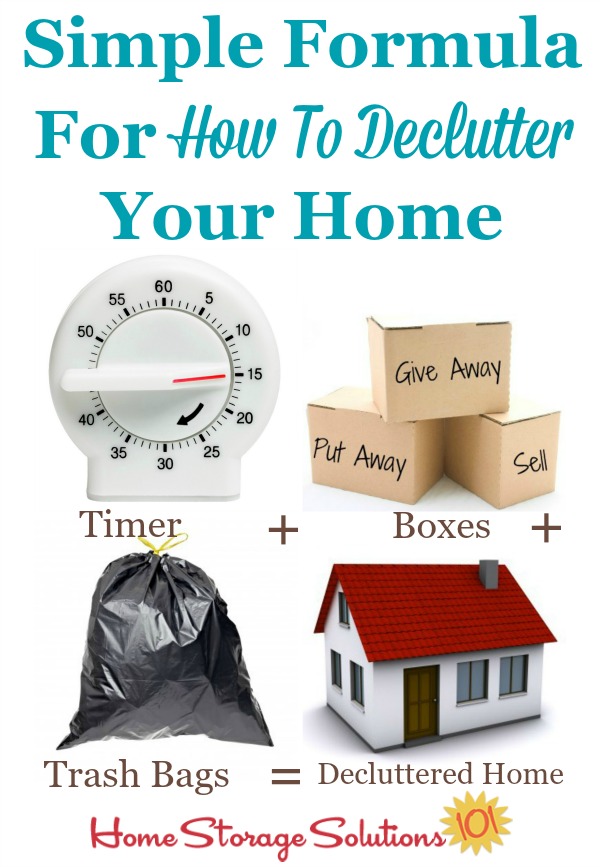
Here's a simple formula for how to declutter your home that anyone can use to find success. If properly applied, with enough time and determination, you too can unclutter your home, and keep it that way.
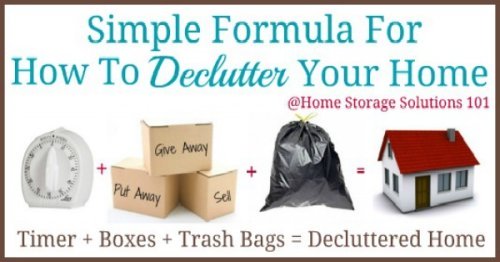
As you can see, the equation is not complex, it just takes a timer, boxes, trash bags (and/or recycling bin or donate or sell boxes), and you'll get a home that is decluttered and ready for you and your family to enjoy together.
Grab Your Decluttering Supplies
When you are learning the process of how to declutter your home I think it is important to set yourself up for success, and this method does this.
The supplies, when used properly, encourage you to take on the task in bite-sized chunks, help you make decisions, and help you finish each decluttering session with positive steps taken, without it looking like a whirlwind has come through your house making it look worse, not better.
Below I've highlighted a few of the most important types of decluttering supplies, since knowing what those are helps you to understand my process for decluttering your home. However, you can also check out this article which lists the top 10 decluttering supplies (which includes a free printable list) if you want even more discussion about the supplies necessary for the process.
Your Handy Timer: A Declutterer's Best Friend
Often, when we make the decision to clear out the clutter in our homes we want to jump in, head first, taking the plunge. While enthusiasm can be great, there is a very real concern that you can take on too much too soon, causing your home to feel more cluttered and out of control than when you began.
If you're doing the 15 minute daily Declutter 365 missions that I've created, and recommend, I suggest you take 10 minutes to declutter and 5 minutes to clean up afterward! Using a timer for decluttering is the simplest method to make sure you stick to your allocated time periods.
If you're going to go with a larger amount of time (not recommended, because I think 15 minutes per session is the sweet spot for decluttering), for every hour you can spend during the session set the timer for 45 minutes. The 45 minute time period is when you'll actually take the steps for how to declutter that I've listed below. Then, during the last 15 minutes of the hour you'll do your clean up so things get completed and back in place before the end of the session.
Timers For Decluttering
Create A Clutter Donation Station
You'll need several empty cardboard boxes, or trash bags, or other bags for this process. I suggest using banker sized boxes, with handles, if possible, so that they are easy to carry around and pick up. Another popular idea, at least for items that aren't too heavy, are pop up laundry baskets.
Make sure whatever you choose is big enough to hold a fair amount of stuff, but not so big that once filled up that they are all but impossible to pick up.
I like banker boxes because they also have lids which make it harder for you to peek at what you've decided to get rid of, and change your mind. Finally, the fact that they have lids also allows them to stack easily for temporary storage while waiting to donate or sell items, before you get them out of your home for good.
You can label your boxes or other containers however you wish, but I suggest labeling them as follows:
- Give away / donate
- Sell
- Put away (in another room)
I hesitate to tell you that there is another category which can be helpful, because it can easily backfire on you if you aren't very committed to the decluttering process. That is the "not sure" box, which is where you can place items that you can't decide whether to keep or get rid of.
If you decide to use this box, just do so with caution and don't let yourself get it more filled up than the size of a SMALL box before making decisions about the items inside.
Note: You can learn more about how to make a clutter donation/selling station in your home here.
Trash Bags And Recycling Bin
Finally, the last supplies you'll need are items to help you get items out of your home that nobody wants -- trash. I suggest using sturdy dark or black bags, because they won't rip as easily when filled up, and also so you can't see what you've thrown away and get second thoughts.
If you've already got a home recycling center set up in your home go ahead and make sure any recyclables you find during the decuttering session find there way there.
Steps To Take In The Process Of Decluttering Your Home
Once you've gathered up your supplies, next you're ready to start your first decluttering session. This will be the first of many sessions you'll have in your home, making small progress, over time with the steps below.
How To Declutter Your House One Session At A Time
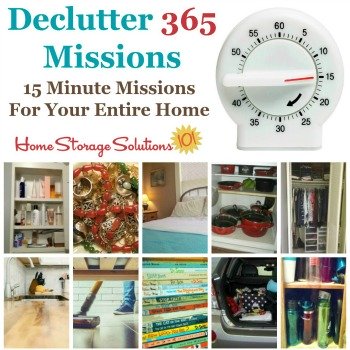
The first step in the process of actually decluttering is to choose what area of your home you'll remove clutter from during the session. This depends, partially, on what you have time for during that session. If you've got half an hour to devote (equivalent of two 15 minute sessions) don't try to declutter your whole house, just one corner of a room, or just a shelf or drawer.
In other words, set realistic expectations of what you can accomplish in the time allowed.
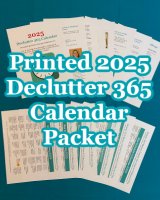
If you don't know where to start I suggest using my pre-made Declutter 365 plan. Every day I've assigned a different 15 minute mission, and you can use it to slowly declutter your home one day at a time! In fact, if you do all the missions your home will be completely decluttered over the course of the year.
You can get the free Declutter 365 Calendar here.

Get Even More Guidance From Me, When You Become A Declutter 365 Premium Group Member
In addition, you can get even more help and guidance from me, in slowly but steadily decluttering your entire home, without making a huge mess in the process, when you join the Declutter 365 Premium group.
Once you've decided the area of your home that you want to declutter in the session, set your timer for the time available, minus the amount of time it will take you to clean up afterward.
Next, line up your labeled boxes, trash bag and recycling bin so they're ready to be used during the process I'll explain next.
You need to concentrate on the small area you've decided to work on during the session, and if you've chosen a larger area begin working on it systematically, from left to right, in a clockwise fashion throughout the room. (The order I've listed isn't actually that important, any systematic approach will work, as long as you stick with it.)
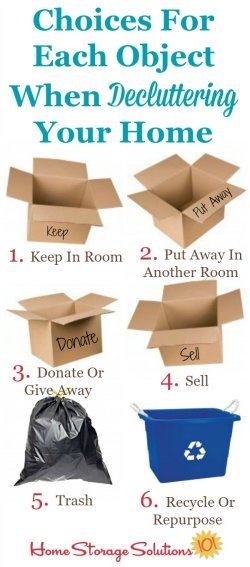
Pick up one item at a time and make a decision about it, before putting it down. There are actually just six choices you can make for any object. You don't have to actually have a box for the items you'll keep in the room if you don't want, but it helps with the illustration below to know what your choices are.
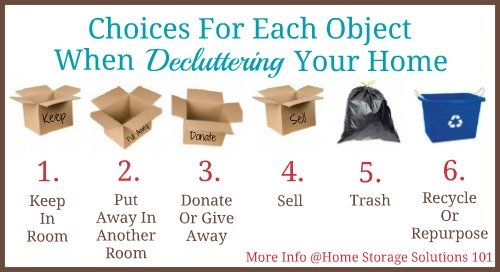
The key to learning how to declutter your home properly is to actually make decisions about each object as you touch them. Your goal should be to touch each object just once during this portion of the decluttering session.
While you certainly will, and should, choose to keep certain items, make sure you're not falling into the trap of shuffling your clutter around and thinking you can keep everything, without getting rid of some stuff.
There's a reason that in the list of 6 choices above, four of them involve removing stuff from your home in some form of fashion, such as donation, selling, trashing, and recycling. Learn more about how to make decluttering progress, and avoid the trap of shuffling around your clutter here.
Clean Up Process At The End Of Each Session
Once the timer goes off, you're now left with several boxes and bags of stuff. If you quit now things would be in worse shape than they were before, so make sure you do the clean up step. It is very important.
First, put back everything that you've decided should stay in the room or area you've just decluttered. If you realize these items need to be organized, do it now if you can, but if it will take longer just place them where they go and come back to that task later.
Next, walk around your home putting away objects you've placed in the put away box that should go elsewhere. To the extent possible go ahead and put these items in their place. However, if the room it goes in hasn't been decluttered yet, and there is currently no home for it, place it in a corner neatly to work on further once you get to that room.
Third, make sure to place all the trash and recycling where they go, so they leave your house on the next trash or recycling day.
Fourth, make sure you take items to the donation center on a regular basis. Go ahead and put the box in your car right now so the next time you're passing the donation center you can just stop in quickly, and drop it off.
Finally, the most troublesome category is the "sell" box. Some decluttering experts don't even recommend having a "sell" category because there is a tendency for all this stuff to pile up or accumulate over time, in the boxes, becoming clutter all over again. They've got a point.
However, often you can make some good money on these items, and in this economy that is not insignificant. Selling your clutter can, for instance, get you money for a well needed vacation or pay for some home storage solutions that will make your home more pleasant and functional to live in.
Therefore, just know that if you choose to sell items you need to have a plan in mind for actually, you know, selling them. We'll discuss this issue further in a later article in the decluttering series.
Get This Generic Room Decluttering Checklist + 32 Other Decluttering Checklists For Your Home
Whatever room of your home you're trying to declutter you can use this generic room decluttering checklist to help you know exactly how to do it. The checklist helps you break down any room into smaller steps, to make the process less overwhelming, and helps you choose a good order for tackling these tasks.
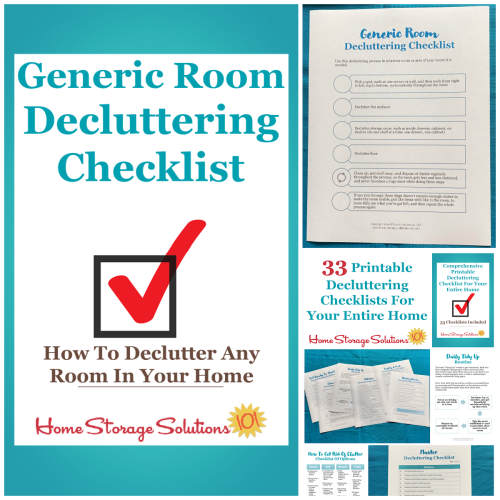
I've done the hard work of breaking down these tasks into smaller more manageable steps for you, so you don't get overwhelmed or worry you're forgetting a task, and you can go at the pace you want, whether that's fast or slow.
In addition, you can tackle these decluttering tasks in whatever order you want when you use these checklists!

What's Next In The Decluttering Your Home Series?
This is just the beginning of the section of this series that discusses how to declutter your home. Now that you've learned the basic steps to take during each session we'll keep discussing strategies for getting started and keeping the momentum going once you've started, or decided to start, since decluttering is not a process that you can accomplish overnight.
Next week we'll discuss no brainer types of items that you can declutter fast.
Some links on this page are affiliate links, meaning that if you purchase a product through them I receive a small commission which helps me provide this information to you for free, plus support my family. My integrity and your satisfaction are very important to me so I only recommend products I would purchase myself, and that I believe would benefit you. To learn more please see my disclosure statement.








Share Your Comments, Tips & Ideas
I would love to hear from you, sharing your thoughts, questions, or ideas about this topic, so leave me a comment below. I try to always respond back!